The kitchen is typically the most time-consuming room to pack in any home. It combines fragile items that require individual wrapping, heavy equipment that needs special handling, and a pantry full of oddly shaped containers that refuse to stack neatly. In most households, the kitchen can take two to three times longer to pack than any other single room — and in many Boston apartments, building logistics make it even more demanding.
This guide gives you a practical, category-by-category approach to packing your kitchen for a move, a printable checklist, realistic time estimates, and specific tips for moving in Greater Boston, where building access, stair fees, and narrow hallways all affect how you plan the job.
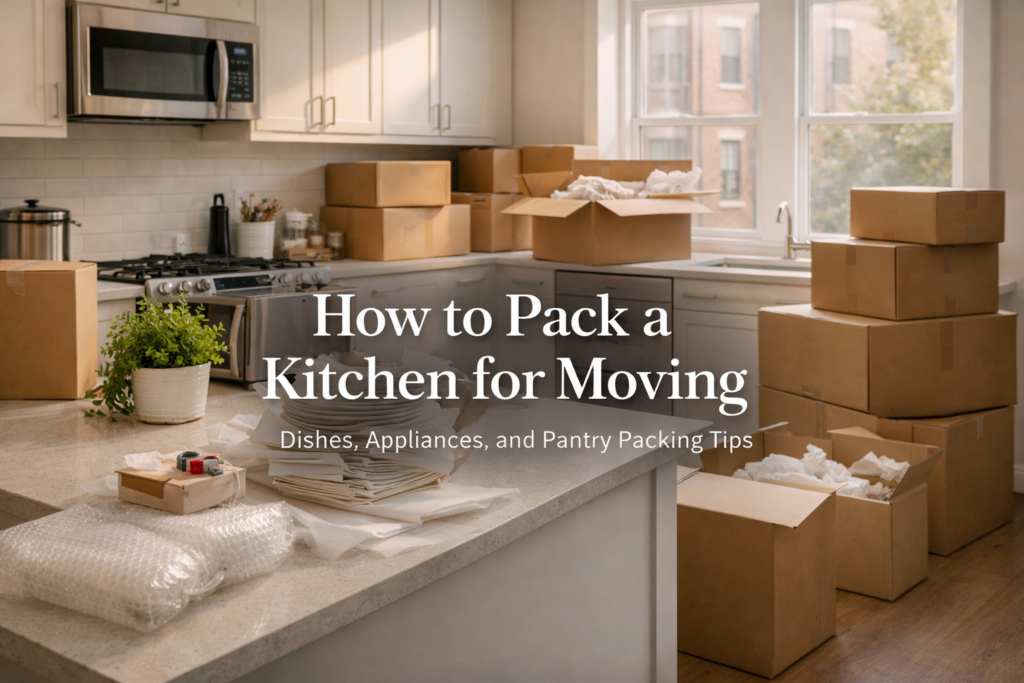
Quick Answer: How to Pack a Kitchen for Moving
- Start packing: 2–3 weeks before move day (pantry and rarely-used items first)
- Supplies needed: Dish pack boxes, cell dividers, packing paper, bubble wrap, foam pouches, stretch wrap
- Most fragile category: Stemware and thin glassware — always pack vertically
- Heaviest items: Cast iron, stand mixer, and large appliances — always use small boxes
- What to pack last: Coffee maker, daily-use utensils, and dish soap
- What not to move: Open pantry items, perishables, and flammable cleaning products
Why the Kitchen Takes the Most Time to Pack
Most people underestimate the kitchen until they start pulling things out of cabinets. In many 2-bedroom Boston apartment kitchens, you can easily find 200 to 400 individual items once you count every dish, glass, utensil, container lid, and pantry item. Each category requires a different packing technique, different box sizes, and different labeling conventions.
The three factors that make kitchens particularly time-consuming are fragility, weight, and volume. Dishes and stemware break easily if packed carelessly. Cast iron pans and stand mixers are so heavy that overloading a single box can make it impossible to carry safely and risks the box failing in transit. And the sheer number of small items — spice jars, lids, measuring cups — requires more individual decisions per cubic foot than any other room in the home.
Treating the kitchen as a single category is the most common packing mistake. The approach that works is breaking it into eight distinct zones and packing each one according to its own rules. That is exactly what this guide does.
Supplies You Need Before You Start

Having the right materials on hand before you open a single cabinet saves significant time and reduces the risk of breakage. For a standard 2-bedroom apartment kitchen in Boston, plan for the following:
| Supply | Quantity (1–2 BR kitchen) | Primary Use |
|---|---|---|
| Dish pack boxes (18x18x28″) | 4–6 | Plates, bowls, wrapped glassware |
| Small boxes (1.5 cu ft) | 6–10 | Canned goods, heavy items, spices |
| Medium boxes (3 cu ft) | 4–6 | Pots, light appliances, pantry dry goods |
| Cell dividers / glass packs | 2–3 sets | Stemware, mugs, glasses |
| Packing paper (unprinted newsprint) | 10–15 lbs | Wrapping all dishes and fragiles |
| Bubble wrap | 1 small roll | Extra protection for stemware and valuables |
| Foam pouches | 12–24 | Wine glasses, fragile mugs |
| Stretch wrap / plastic wrap | 1 roll | Bundling utensils, securing lids |
| Permanent markers (2–3) | 2–3 | Labeling every box top and side |
| Packing tape + dispenser | 3–4 rolls | Sealing all boxes |
Tip: Do not substitute printed newspaper for packing paper. The ink transfers onto dishes and requires rewashing everything after unpacking. Unprinted packing paper is available at most moving supply retailers and online.
If you would rather not source all of this yourself, Continental Moving’s packing service includes all materials and can handle the kitchen as a standalone room — useful if you want to pack most of the apartment yourself but hand off the most time-intensive space.
Dishes, Plates, and Bowls
Dishes are the category most commonly packed incorrectly. The instinct is to stack plates flat — the same way they sit in a cabinet. That is exactly wrong for moving. Plates packed flat bear weight from above and can crack under the pressure of the box contents or a bump in transit.
The correct method: pack plates vertically, on their edge, like records in a crate. A plate standing on its edge can absorb lateral forces along its strongest axis. Packed this way, a standard dinner plate can survive normal transit with two sheets of packing paper wrapped around it and no bubble wrap at all.
Step-by-step for dishes:
- Line the bottom of a dish pack box with 3–4 inches of crumpled packing paper
- Wrap each plate individually in 2 sheets of packing paper, tucking the edges in
- Stand wrapped plates vertically in the box, tightly enough that they do not shift
- Group plates by size — dinner plates together, salad plates together, side plates together
- Fill gaps between standing plates with crumpled paper to eliminate movement
- Layer a sheet of cardboard or foam between size groups
- Top off with 2–3 inches of paper before sealing
- Label the box: KITCHEN — DISHES — FRAGILE — THIS SIDE UP
For bowls: nest smaller bowls inside larger ones with a sheet of paper between each. Wrap the nested stack as a unit, then stand the stack on its side in the box just like a plate.
Glasses, Mugs, and Stemware
Stemware is the most fragile category in any kitchen. Wine glasses and champagne flutes have thin stems that can snap under lateral pressure even when individually wrapped. The key rules are: always pack glasses vertically (rim down), always use cell dividers for stemware, and never place anything on top of a glass pack box.
For everyday glasses and mugs:
- Stuff the inside of each glass with crumpled packing paper — this prevents the interior from collapsing inward
- Wrap the outside in 2–3 sheets, overlapping and tucking at the base
- Place glasses upright (rim down) in a dish pack box with cell dividers
- Each cell should hold exactly one glass with no room to shift
- Fill the top of the box with crumpled paper before sealing
For wine glasses and stemware:
- Use foam stem pouches if available — slide the stem in first, fold the pouch over the bowl
- Wrap the entire glass in one additional sheet of packing paper over the pouch
- Place in cell dividers, stem down, so the base (the strongest part) sits on the box bottom
- Use a glass pack with cells sized for stemware — standard cell kits are often too wide
- Never stack a second layer of glasses on top of stemware
- Label: KITCHEN — STEMWARE — FRAGILE — DO NOT STACK
Mugs with handles require extra attention. After wrapping the body of the mug, add a separate piece of paper around the handle and tape it lightly in place before the final outer wrap. The handle is almost always the first thing to break when mugs shift in transit.
Pots, Pans, and Bakeware
Pots and pans are durable but heavy, and the main packing risk is not breakage — it is overloading boxes. A single Dutch oven can weigh 12–15 lbs. A box of mixed cast iron and stainless cookware can reach 40–50 lbs, which is unsafe to carry and risks the box bottom failing.
Weight rule for kitchen boxes: no cookware box should exceed 30 lbs. If a box feels too heavy to lift comfortably with both hands from a squat, it is too heavy. Split the contents into two boxes.
Packing method for cookware:
- Wrap each pot and pan in a single sheet of packing paper — this prevents scratching non-stick surfaces, not breakage
- Nest smaller pans inside larger ones with a sheet of paper between each to protect coatings
- Pack lids separately, wrapped in paper and stood on their edges in the same box as the matching pot
- Heavy cast iron pieces go in small boxes, alone or with one other item maximum
- Baking sheets and cutting boards can be bundled together with stretch wrap and moved flat outside of boxes, or stood upright in a tall box alongside other flat items
- Label every box: KITCHEN — COOKWARE — HEAVY
Non-stick cookware needs particular care. Even a small gouge from another pan during transit can compromise the coating permanently. Always wrap non-stick surfaces individually and never allow metal items to contact the interior of a non-stick pan in the box.
Small Appliances

Small appliances are best packed in their original boxes when available. If you no longer have the original packaging, a medium moving box with adequate paper cushioning works well for most items. The critical step many people skip is securing cords before packing — loose cords can wrap around appliance components and cause damage, and they create a tangle that slows unpacking significantly.
Category-by-category guidelines:
Coffee Maker and Electric Kettle
Remove the carafe or glass components and pack them separately as fragile items. Wrap the main unit in 3–4 sheets of paper, place in a medium box, and fill all void space with crumpled paper. Tape cords to the body of the appliance with masking tape (not packing tape, which can leave residue on plastic). Pack the coffee maker last — it is usually the final thing used before a move and the first thing needed after.
Stand Mixer and Food Processor
Stand mixers are among the heaviest small appliances in most kitchens, often weighing 20–26 lbs. Always use a small box for the base unit — never a medium or large box, which invites overpacking. Remove all attachments and bowl components and pack them separately, wrapped in paper and labeled to match. Food processor bowls and blades should be wrapped individually; blades in particular should be wrapped in several layers of paper and taped so the edge cannot cut through the packaging.
Toaster, Toaster Oven, and Microwave
Shake loose crumbs out of toasters and toaster ovens before wrapping — crumbs in a sealed box attract pests. Wrap toasters in 2–3 sheets of paper and pack in a small or medium box. Microwaves are bulky; if you no longer have the original box, wrap in paper and pack in the largest box that still allows a snug fit with paper filling the gaps. Label: KITCHEN — MICROWAVE — FRAGILE.
Blender and Immersion Blender
Remove the blade assembly from blender pitchers before packing and wrap the blade separately with multiple layers of paper. The pitcher goes separately wrapped in a dish pack box. Immersion blenders can be wrapped and packed alongside other lightweight items in a medium box.
Large Appliances: Refrigerator, Stove, and Dishwasher
Large kitchen appliances require preparation, not just packing, and most of that preparation needs to happen 24–48 hours before move day rather than on the morning of the move.
Refrigerator
Defrost the freezer compartment at least 24 hours before your move. A refrigerator moved with active frost or standing water can leak throughout transit and into the moving truck. On move day:
- Remove all food and dispose of or pack perishables separately in a cooler
- Remove shelves, drawers, and interior bins — wrap them in paper and box them separately labeled FRIDGE COMPONENTS
- Tape the refrigerator and freezer doors closed with stretch wrap or moving straps (not packing tape directly on the finish)
- Refrigerators must travel upright — if laid on their side, the compressor oil can migrate and the unit may need 2–4 hours standing upright before it is safe to power back on
Stove and Oven
Clean the stove before moving — grease residue can attract pests and create odors in the moving truck. Remove grates and burner covers, wrap them in paper, and box separately. Gas stoves must be disconnected by a licensed gas technician before your move; this is not a DIY task and your building management may require documented disconnection before allowing the unit to be removed.
Dishwasher
Run a cleaning cycle before your move. Disconnect the water supply and drain hose, and allow the unit to dry fully before it is moved. In Boston rental apartments, dishwashers are often considered part of the unit’s fixtures — verify with your landlord before disconnecting or removing a built-in dishwasher.
For all large appliances, professional movers in Boston include appliance dollies and moving blankets in their standard service. Attempting to move a full-size refrigerator without an appliance dolly on a Boston walk-up staircase is one of the most common causes of wall damage and injury on moving day.
Pantry, Food, and Dry Goods

The pantry is the one kitchen category where the dominant question is not how to pack it — it is whether to pack it at all. Moving food, especially across a long distance, is often less cost-effective than it appears. The weight of canned goods and jars adds to your overall move cost on weight-based long-distance contracts, and partially open containers frequently spill or attract pests in transit.
What is worth moving:
- Unopened canned goods and sealed dry goods (pasta, rice, beans)
- Sealed condiments and oils that fit upright in a small box
- Spices in sealed containers that are difficult to find locally or have particular value
- Sealed baking supplies (flour, sugar) in their original bags, inside a zip-lock as a secondary seal
What to consume, donate, or discard before moving:
- Open condiments, sauces, and dressings — lids loosen in transit and leaks are extremely common
- Perishables from the refrigerator and freezer
- Bulk dry goods that are heavy and inexpensive to replace
- Cleaning products that contain bleach or ammonia — most moving companies will not transport these, and they can damage other items if they leak
- Alcohol: check regulations for your destination state on long-distance moves
For pantry items that are worth moving, use small boxes only. A box of canned goods fills quickly and will exceed safe lifting weight before it looks full. Label every pantry box with its contents on the side of the box, not just the top, so you can identify it in a stack. If you are weighing whether to move or discard a heavy pantry, the Continental Moving cost guide breaks down how weight and volume affect pricing on both local and long-distance moves.
Knives, Sharp Tools, and Utensils
Knives are the most significant safety hazard in kitchen packing. Loose knives in a box can cut through packing paper and injure anyone who reaches into the box without seeing them. Individual blade guards are the safest option for chef’s knives and carving knives. If you do not have guards, the correct wrapping method is:
- Lay the knife on a corner of packing paper with the blade pointing away from you
- Fold the paper over the blade edge first, then roll the knife toward the opposite corner
- Tape the roll closed so it cannot unwind in transit
- Pack all knives point-down in a box, never loose in a drawer or bag
- Label the box: KITCHEN — KNIVES — OPEN CAREFULLY
A knife roll or knife block can be moved as-is with the knives secured inside, wrapped in paper on the outside, and placed in a box with soft padding. The block method is faster and safer than individual wrapping for large knife sets.
For general utensils (spatulas, ladles, wooden spoons, whisks): bundle by type and size, wrap each bundle loosely in packing paper, and place in a medium box. Utensils do not need individual wrapping. Metal utensils can go in a small box together; the weight adds up faster than expected, so keep utensil boxes under 20 lbs.
Junk Drawer, Kitchen Linens, and Everything Else
The kitchen drawer category is a time trap if you approach it without a plan. The fastest method is to line a small box with a trash bag, dump the drawer contents in, seal the bag, and label the box as the source drawer. This approach is fine for non-fragile miscellaneous items and preserves the organization you already had in the drawer without sorting during packing.
For kitchen towels, oven mitts, pot holders, and aprons: these make excellent packing material for fragile items. Wrap a serving bowl in two kitchen towels instead of paper, place it in a box, and you have packed two categories at once. This works particularly well for irregular-shaped items that are difficult to wrap in flat paper sheets.
Items that need individual attention before the drawer method:
- Batteries — remove from drawers and pack separately; they can corrode if loose in a sealed box for days
- Rubber bands and twist ties — these deteriorate and tangle in transit; discard or bag separately
- Small scissors or box cutters — wrap blades individually before the drawer dump
- Prescription or OTC medications stored in kitchen drawers — move these personally, not with the moving truck
Complete Kitchen Packing Checklist
Use this packing kitchen checklist as your room-by-room guide. Work through each category in order — starting with the least-used items and finishing with daily essentials.
3 Weeks Before Move Day
- Audit the pantry — decide what to move, donate, or discard
- Order packing supplies (dish packs, cell dividers, packing paper)
- Schedule gas stove disconnection with a licensed technician if applicable
- Start using up pantry items to reduce what needs to be moved
1–2 Weeks Before Move Day
- Pack rarely-used items: seasonal bakeware, entertaining dishes, extra glassware
- Pack small appliances used less than once a week
- Pack pantry items that are sealed and worth moving (canned goods, dry goods)
- Pack the spice collection (except daily-use spices)
- Pack knives and knife block
- Pack serving platters, cake stands, specialty bakeware
- Begin labeling all packed boxes on top and at least one side
2–3 Days Before Move Day
- Pack most remaining dishes and bowls (keep one set per person for the final days)
- Pack most glasses and stemware (keep 2 glasses per person)
- Pack pots and pans (keep one pot and one pan for final meals)
- Defrost freezer if refrigerator is moving with you
- Pack pantry overflow and any items decided to move
- Pack kitchen linens, oven mitts, aprons
Move Day Morning — Pack Last (Essentials Box)
- Coffee maker and kettle (used this morning)
- Final dish set, glass, and utensils (used for breakfast)
- Remaining dish soap and sponge
- Refrigerator contents into cooler
- Remove and box refrigerator shelves and drawers
- Tape refrigerator and freezer doors closed
- Final sweep of all cabinets, including above the refrigerator
How Long Does It Take to Pack a Kitchen?
Packing time varies significantly based on kitchen size, the amount of contents, and whether you have all supplies on hand before you start. The table below reflects estimates for a self-pack approach in a typical Boston apartment kitchen.
| Kitchen Size | Estimated Self-Pack Time | Estimated Professional Pack Time | Approximate Box Count |
|---|---|---|---|
| Studio or 1-BR (small kitchen) | 4–6 hours | 1.5–2.5 hours | 8–14 boxes |
| 2-BR apartment (medium kitchen) | 6–10 hours | 2.5–4 hours | 14–22 boxes |
| 3-BR home (large kitchen) | 10–16 hours | 4–6 hours | 22–35 boxes |
These estimates assume everything is being packed, not just the items you plan to move. Kitchens where the owner has already culled the pantry and made keep-or-discard decisions before starting tend to pack noticeably faster than kitchens where those decisions are being made during packing.
Professional packers work significantly faster for two reasons: they make no decisions (they pack everything that is not explicitly excluded), and they have a practiced system that eliminates the hesitation that slows most self-pack sessions. If your move has a tight timeline, the kitchen is the room where professional packing help pays off most clearly.
Need help packing the kitchen — or just the fragile items?
Continental Moving offers full-kitchen packing, partial packing (fragile items only), and supply-only options for Greater Boston moves. Request a free estimate and let us know which rooms you want help with — we will break it out by room so you can decide exactly how much assistance fits your budget.
Boston-Specific Packing and Moving Tips for the Kitchen

Packing a kitchen for a move in Greater Boston comes with a few considerations that do not apply in most other US cities. Building access, stair logistics, and the city’s dense rental market all affect how you plan moving day for a kitchen-heavy load.
Walk-Up Buildings and Heavy Kitchen Items
Boston, Cambridge, and Somerville have a high concentration of walk-up apartment buildings with no elevator access. Heavy kitchen items — stand mixers, cast iron collections, Dutch ovens, and full dish pack boxes — are among the most physically demanding items to carry up multiple flights of stairs. Most professional movers add a per-floor stair fee for walk-up buildings, and kitchen boxes are a primary reason those fees add up. Keeping kitchen boxes under 30 lbs is not just good packing practice — in a walk-up building, it directly affects how smoothly move day goes. If you are moving in or out of a walk-up, our Boston apartment movers are equipped with the right dollies and crew size for stair-heavy jobs.
Narrow Hallways and Large Appliance Access
Many Boston apartment buildings have hallways too narrow for a standard appliance dolly to operate without careful maneuvering. Before move day, measure your hallway and staircase width and communicate those dimensions to your moving company when you book. This is especially important for full-size refrigerators in older Beacon Hill, Back Bay, and South End buildings, where doorways can be narrower than modern building code requires.
Freight Elevator Booking
Buildings in South End, South Boston, and the newer Cambridge and Seaport developments typically have freight elevators with reserved windows, often limited to weekdays between 8:00 AM and 5:00 PM. Heavy kitchen loads — particularly appliances and full dish pack boxes — go through the freight elevator. Confirm your building’s freight elevator policy and reserve your window before your move date. Missing the window can mean your kitchen load sits in the lobby until the next available slot.
Parking Permits for Kitchen-Heavy Loads
A kitchen-heavy move often requires more time at the curb than a typical residential move because of the number of boxes and the care required for fragile items. Reserving a City of Boston moving truck permit reserves a legal curbside space for your truck for the full duration of the move. Two practical details worth knowing before you book: online applications require your move date to be at least 15 days in the future, and the no-parking signs must be posted at the reserved space a minimum of 48 hours before your move day. Check the portal for current pricing, and build both of those lead times into your scheduling when you confirm your move date.
FAQ: How to Pack a Kitchen for Moving
How far in advance should I start packing my kitchen?
Start 2–3 weeks before your move date. Begin with the items you use least frequently — seasonal bakeware, extra serving dishes, the guest wine glasses — and work forward toward daily essentials. Packing in stages over several weeks is significantly less stressful than trying to pack the entire kitchen in one day, and it reduces the risk of accidentally boxing something you need in the final week before the move.
What is the safest way to pack wine glasses for moving?
Wine glasses should always be packed vertically with the stem pointing down into cell dividers sized for stemware. Each glass gets a foam stem pouch (or several layers of bubble wrap around the bowl), plus one outer layer of packing paper. Never stack a second layer of stemware on top of a first layer in the same box, and always label the box DO NOT STACK on the top and all four sides. The most common cause of stemware breakage in transit is another box placed on top — not rough handling.
Should I use newspaper to pack dishes?
No. Printed newspaper ink transfers onto dishes and requires rewashing everything before you can use it after unpacking. Unprinted packing paper (sometimes called newsprint or butcher paper) is the correct material — it is inexpensive, widely available, and leaves no residue. If you are genuinely out of packing paper on move day, clean kitchen towels and cloth napkins make a reasonable short-term substitute for non-fragile items.
Can I move an open refrigerator full of food?
No. The refrigerator must be emptied, defrosted, and dried before it can be safely moved. A loaded refrigerator is too heavy to handle safely and the contents will shift and break during transit. Perishables should go into a cooler with ice on move day. Give yourself 24 hours after plugging in the refrigerator at the new location before loading it with food — compressors that were jostled during the move need time to settle before they operate at full efficiency.
How do I pack a kitchen for a long-distance move differently than a local move?
Long-distance moves add two considerations that local moves do not. First, your boxes will be on a truck for hours or days rather than minutes, so every fragile item needs extra wrapping — two layers where you might use one for a local move. Second, weight matters more because long-distance moves are often priced by weight. Heavy pantry items like canned goods and bulk dry goods that seem worth moving locally may not be cost-effective to ship long distance. Review the pantry section above carefully and be more aggressive about consuming or donating before a long-distance kitchen pack.
What should I pack in my kitchen essentials box?
Your kitchen essentials box — sometimes called the open-first box — should contain everything you need for the first morning in your new home without opening any other boxes: one set of dishes and utensils per person, two glasses, the coffee maker and coffee, dish soap and a sponge, paper towels, and a bottle opener. Pack it last, load it last (or keep it in your car), and unload it first. Label it clearly: KITCHEN — OPEN FIRST.
How much does professional kitchen packing cost in Boston?
Professional packing service for a kitchen in Greater Boston can typically run $250–$600 for a 1–2 bedroom apartment kitchen, depending on the volume of items, fragile content, and whether materials are included in the quote. Full-kitchen packing by a two-person crew often takes 2–4 hours. Partial packing — fragile items and glassware only — can often run $150–$350. Always confirm whether packing materials are included in the quoted price or billed separately, as material costs vary by kitchen size. The Continental Moving cost guide has a full breakdown by service type and apartment size.
The Bottom Line: How to Pack a Kitchen for Moving
A well-packed kitchen starts with the right supplies, a category-by-category approach, and a realistic timeline. The core rules are consistent across every item type: pack plates vertically, glasses upright with dividers, heavy items in small boxes, knives individually wrapped and labeled, and appliances prepped 24–48 hours before move day. Start the pantry decisions 2–3 weeks out, work through the rarely-used items first, and leave daily essentials to the last morning.
If you are moving in Greater Boston, factor in your building’s walk-up configuration, freight elevator window, and hallway dimensions before you build your packing timeline. Those logistics affect the kitchen more than any other room because of the weight and volume of boxes involved.
If you want a professional packing team to handle the kitchen — the full room, just the fragile items, or just the appliance prep — request a free estimate from Continental Moving. We serve households throughout Greater Boston, including Cambridge, Somerville, Brookline, Newton, Quincy, and the South Shore, and can break out kitchen packing as a standalone service or combine it with your full move.
Authoritative Resources
- ATA Moving & Storage — Industry standards, licensed mover directory, and consumer guides
- Massachusetts: Moving Within Massachusetts — Official guidance on hiring movers and consumer protections in MA
- City of Boston: Moving Truck Permits — Official permit information and online application
- USDA FoodKeeper App — Reference for safe food handling and what to discard before a move
Continental Moving provides professional local and long-distance moving and packing services throughout Greater Boston, including Cambridge, Somerville, Brookline, Newton, Quincy, and surrounding communities.